Last modified 2025-10-06 |
Attach an IDE to a Study (Tutorial)
 | Abbreviations Key |
| HISE | Human Immune System Explorer |
| IDE | integrated development environment |
| SDK | software development kit |
At a Glance
A HISE study is a workspace for collaborative research. Studies contain documents, data, visualizations, research methods, statistics, IDEs, Certificates of Reproducibility, and other project materials. This document explains how to attach an IDE to a study in HISE. If you have questions, contact Support.
Instructions
 Upload your input files
1. Navigate to HISE, and use your organizational email address to sign in.
2. From the top navigation menu, click RESEARCH > IDEs.
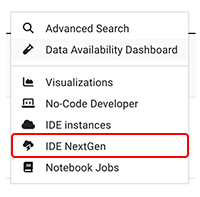
3. Find the card for the IDE you want to add to your study.
A. To create a new IDE, click CREATE IDE INSTANCE. Then follow the remaining instructions (Steps 6-10) in Create Your First HISE IDE (Tutorial).

B. To open an existing IDE, click the Play icon.
![]()
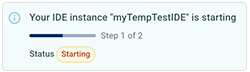
C. When you're notified that the IDE is running, click the boxed arrow icon to open it.


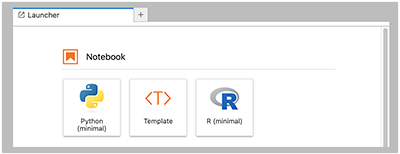
4. On the Launcher tab of your open (new or restarted) IDE, in the Notebook section, choose Python or R.
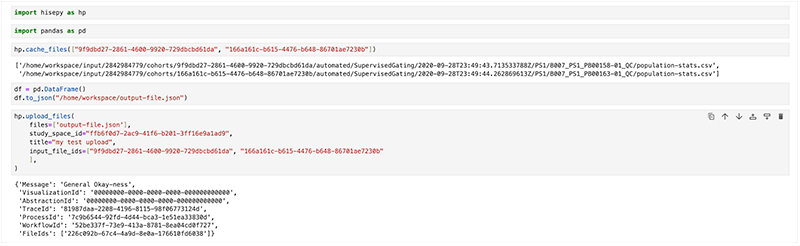
5. To import the HISE SDK and (optional) the Pandas library, run the following code in the first cell of your notebook.
import hisepy as hp

import pandas as pd
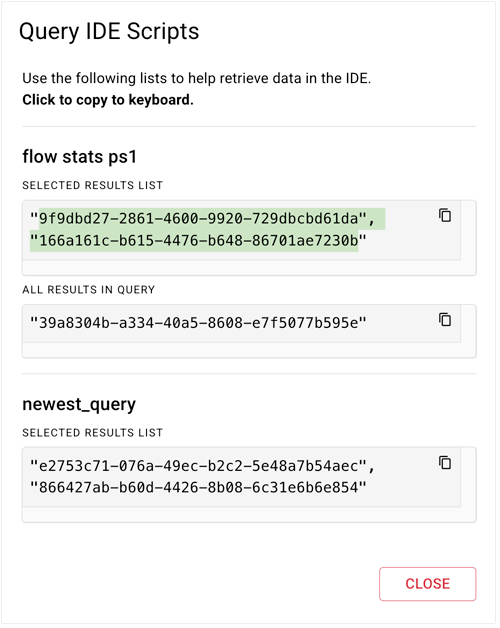
6. To find your file input IDs, follow the steps below.
A. On the Search Results page, click GET IDE SCRIPTS.
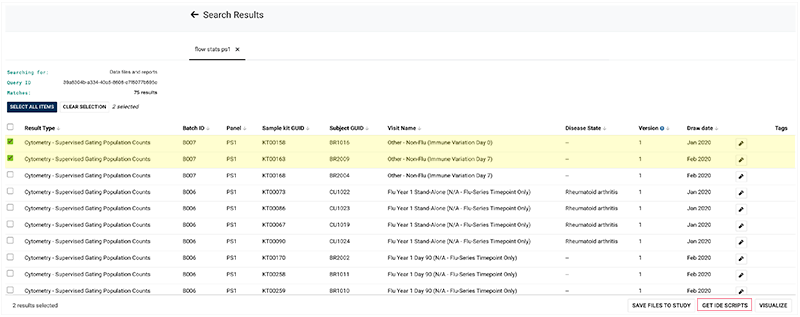
B. In the Query IDE Scripts dialog box, copy the input file IDs.
7. To download your input files to HISE, return to your open IDE notebook, and enter the following code (replacing the example file IDs with your own, of course) in a new cell. This command stores the cached files in the cloud and makes them available to your local workspace for processing.
hp.cache_files(["9f9dbd27-2861-4600-9920-729dbcbd61da", "166a161c-b615-4476-b648-86701ae7230b"])
8. To create and save an output file, run the following code in a new cell. If you like, replace output-file.json with a more descriptive filename. You can also use a different file type, such as to_hdf, to_excel, or to_dict.
df = pd.DataFrame()

df.to_json("/home/workspace/output-file.json")
9. Use the following instructions to find your study_space_id, which you'll need in Step 1.11.
A. Beginning/intermediate users. Find your study_space_id in the study URL path parameters.
i. From the top navigation menu, click COLLABORATION SPACE.

ii. Click the card for the study space whose ID you want to add.
iii. Copy the path parameter from the URL, between studies/ and /reports (the highlighted portion in the example below).
https://dev.allenimmunology.org/#/collaboration/studies/ffb6f0d7-2ac9-41f6-b201-3ff16e9a1ad9/reports
B. Power users. To find the study_space_id programmatically, call hp.get_study_spaces()
10. In the next cell, enter your hp.upload_files() call with the four required parameters, including the input_file_ids from Step 1.7 and the study_space_id from Step 1.9. You can copy the code below (left). The image at right shows an example hp.upload_files() call. For a list of upload_files parameters, see Step 2 in Use the Upload Files SDK Method (Tutorial).
|  |
 View the IDE in your study space
1. From the top navigation menu in HISE, choose COLLABORATION SPACE.
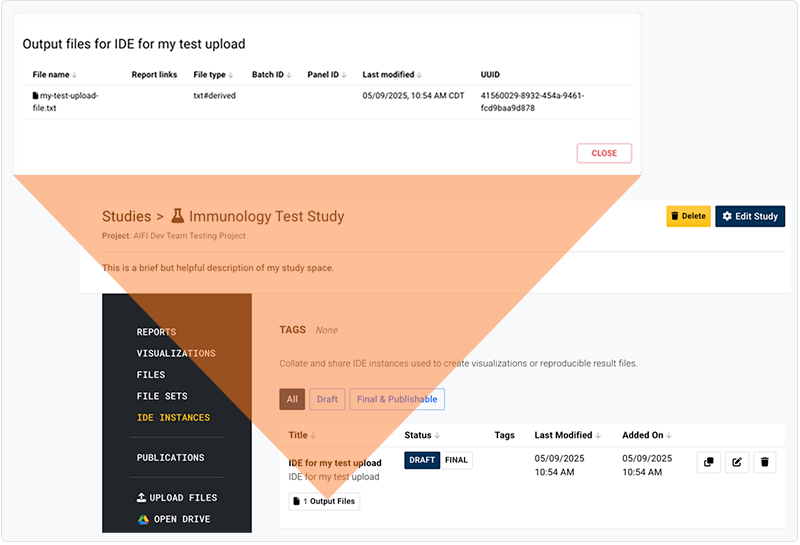
2. Find and click the card for the study to which you uploaded your files in Step 1.10.
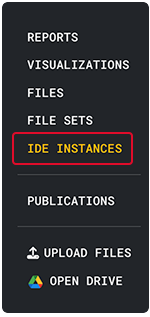
3. From the side navigation menu, choose IDE Instances.
4. This view shows all the notebooks that have uploaded data or visualizations to your study by calling hp.upload_files(), hp.save_dash_app(), or hp.save_visualization(). To see the output files associated with a given IDE, click Output Files.
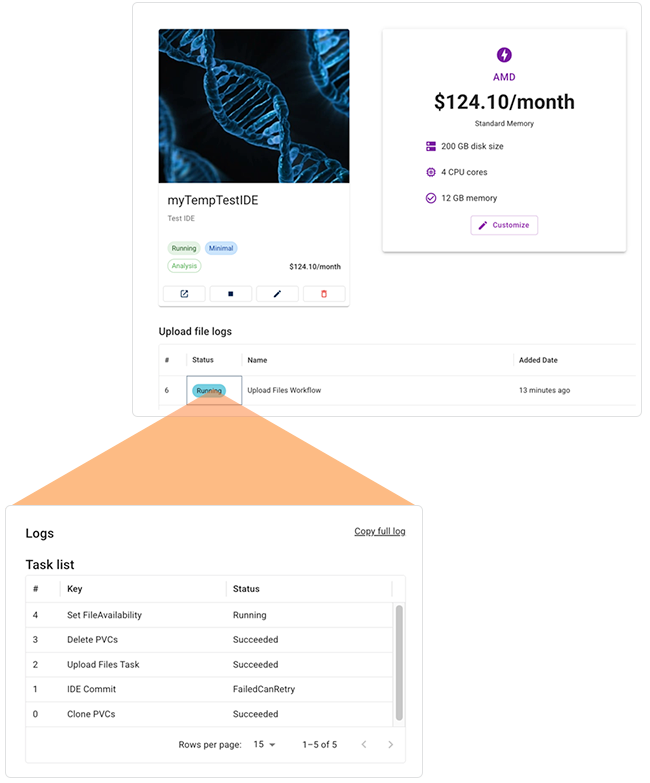
5. If the IDE doesn't appear in your list of IDE instances, it's likely that the processes are still running. To see which processes are complete and which are still running, follow the steps below.
A. In the HISE top navigation menu, choose RESEARCH > IDEs.
B. Click the card for your IDE.
C. To drill down into the upload files workflow, click the Running tag. Your IDE will appear in the IDE Instances side navigation only after all processes have succeeded.
 Related Resources
Create Your First HISE IDE Instance (Tutorial)