Create a GitHub Repository for Your NextGen IDE (Tutorial)
 | Abbreviations Key |
| auth | authorization |
| CLI | command line interface |
| ECL | electrochemiluminescence |
| gh | GitHub |
| HISE | Human Immune System Explorer |
| HTTPS | hypertext transfer protocol, secure |
| IDE | integrated development environment |
| SDK | software development kit |
| SSH | secure shell |
At a Glance
To create a continuous, version-controlled record of your analysis, you can integrate your NextGen IDE with GitHub. This document explains how to create a GitHub repository compatible with your HISE NextGen IDE. You can use your new repo to store the code you generate in your research.
This repo is not intended to store notebook code associated with the |
Why Use Git and GitHub?
If you’re already Git groupie, feel free to skip this section! There are two main reasons to use GitHub: code sharing (GitHub) and version control (Git).
Code sharing is self-explanatory: storing code in GitHub makes it easy to share internally and externally so others can understand your methodology and reproduce your research. Code sharing also lets us build on each other’s work, rather than write new code each time.
Git's version control features are useful for collaborative coding and make it easy to track multiple users' changes to the code base. Version control also lets you revert your changes if necessary, retrieve deleted code snippets that you later realize are still useful, or iterate on the code with the older versions as backup.
Git Repositories
A Git repository ("repo," for short) stores related code, files, and references for a given package, project, or experiment. The following instructions explain how to create a GitHub repo for a NextGen IDE.
Instructions
1. Navigate to HISE, and use your organizational email address to sign in.
2. From the top navigation menu, click Research > IDE NextGen.
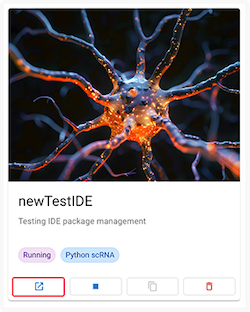
3. Find the card for the IDE you want to work with.
4. In the lower-left corner, click the Open icon.

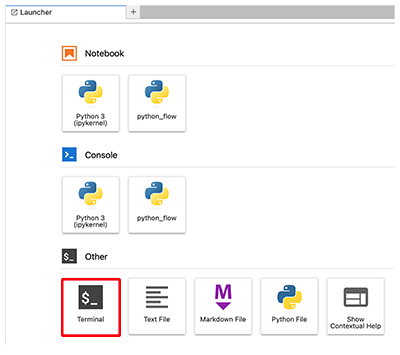
5. Wait for the instance to open. Then, on the Launcher tab, click Terminal.

6. At the prompt, enter the following command:
gh auth login
The gh prefix identifies this as a GitHub CLI command. This platform has a specialized UI that lets you interact with Git from your terminal or, in this case, from a terminal within your IDE. GitHub CLI lets you create and clone repos, submit pull requests, and manage your Git workflow from the command line. The preceding gh authorization command prompts a series of questions and answer choices to appear in your terminal window. To accept each default answer, press Enter.
A. Question 1: Where do you use GitHub? To accept the default answer, GitHub.com, press Enter.

B. Question 2: What is your preferred protocol for Git operations on this host? To accept the default answer, HTTPS, press Enter.

C. Question 3: Authenticate Git with your GitHub credentials? To accept the default answer, Y, press Enter or type Y.

D. Question 4: How would you like to authenticate GitHub CLI? To accept the default answer, Login with a web browser, press Enter.

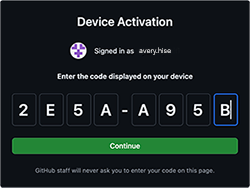
7. A one-time eight-digit GitHub activation code appears. (The code expires in 15 minutes, so now is not the time for a sushi run.) Click the link to open a browser window. If you get an error message, see the following note.

An error message appears if you press Enter to open the link in Step 7.
That's because the IDE doesn't support browsers. Instead, click the link to open a browser window.
|
8. To accept the terms and authenticate your request for GitHub access, paste the code you just copied.

9. Return to your IDE. In the side navigation pane, click the Git icon.
![]()
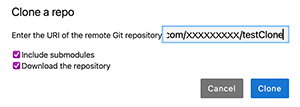
10. Choose Clone a Repository. (You'll need to clone your repo only once, because after the files and folders in the repo have been cloned to your local machine, you can then interact with them on a local Git branch.)

11. Paste the HTTP link for your repository and select the checkbox next to Download the Repository.

12. Click Clone. Voilá! Enjoy your fully integrated Git experience.

Don't forget to stop your IDE instance when you finish working with it for the day.
 Related Resources
Manage NextGen IDE Instances (Tutorial)
Manage Packages in HISE NextGen IDEs


