
Create Your First NextGen IDE Instance (Tutorial)
 | Abbreviations Key |
| AIFI | Allen Institute for Immunology |
| HISE | Human Immune System Explorer |
| IDE | integrated development environment |
At a Glance
HISE serves as the central research hub for AIFI cloud data storage, visualization, and analysis. The Jupyter Notebook, a type of IDE, provides an interactive environment for exploring HISE data and deriving further insights from your data. This document explains how to create your first NextGen IDE in the Jupyter Notebook environment.
For examples of how to analyze specific types of data, see the notebooks in the examples directory of your IDE.
Navigation TipsWhen you work in a notebook, pressing Enter takes you to the next line. To execute your code instead, press Shift+Enter. To autocomplete a method name, press Tab (all method names should be prepended with |
Instructions
1. Navigate to HISE, and use your organizational email address to sign in.
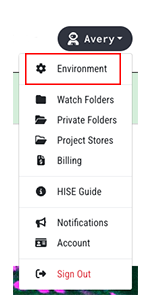
2. In the upper-right corner, click your name, and then choose Environment.
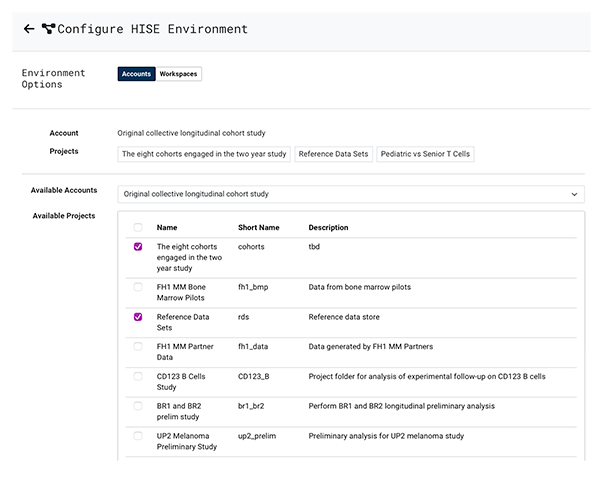
3. On the Accounts tab, choose one or more projects you want to work with. (To select or deselect all projects, select or deselect the checkbox to the left of the Name field in the Available Projects box.)
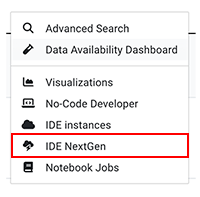
4. From the RESEARCH menu in the top navigation, choose IDE NextGen.
5. On the IDE NextGen page, click Create IDE instance. (Alternatively, to open an existing instance, click on the card that represents the instance you want to open. To find a particular instance, use the Sort by field to sort existing instances by status or last modified date, or type a keyword into the Search by instance name field.)

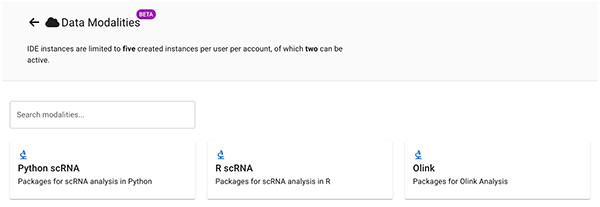
6. On the Data Modalities page, choose the modality that best fits your research. Choosing a modality assigns the right tools, libraries, and compute resources to your IDE and ensures that the environment is compatible with the expected data types.
7. On the Confirm Data Modality page, click Confirm.
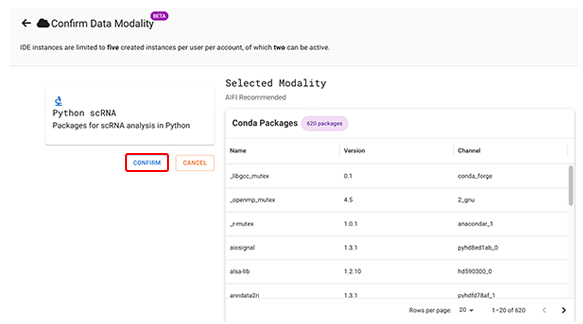
8. On the IDE Settings page, complete the following fields:
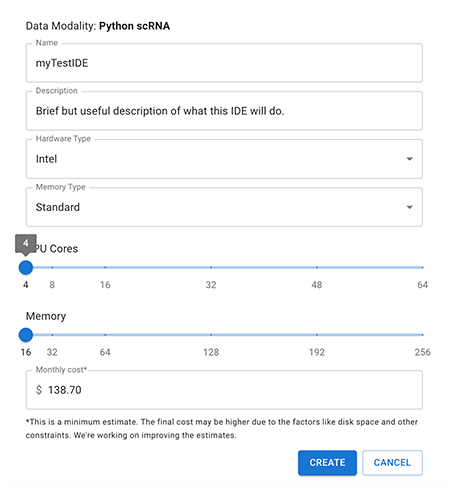
A. In the Name field, enter a name for your IDE. It must be at least 10 characters in length (maximum 255 characters).
B. (Optional) In the Description field, enter a brief explanation of what the IDE will be used for.
C. In the Hardware Type field, keep the default unless you prefer the alternative.
D. In the Memory Type field, choose High Memory if you have plenty of memory available and want your functions to run faster, especially if you're working with large datasets. Otherwise, choose Standard.

E. On the CPU Cores slider, choose the number of cores you want. (The standard configuration has 4 GB of memory per CPU core, and high memory has 8 GB per core.) The Memory slider adjusts automatically. and your estimated cloud billing cost appears in the Monthly cost field.
9. Nice! Now go grab a cup of coffee while your instance is created. It'll take just a few minutes.

When your instance is ready, you'll see an IDE management screen with the name you assigned to your IDE—in this case, myTestIDE.
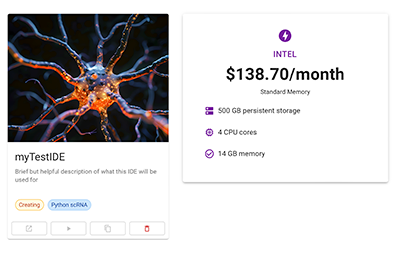
10. To open your IDE, click the summary card. A dialog box on the same screen shows the specs and estimated monthly cost of the instance.
 Related Resources
Manage NextGen IDE Instances (Tutorial)
NextGen IDEs Q&A and Troubleshooting Guide