Use Watchfolders to Ingest Data (Tutorial)
 | Abbreviations Key |
| csv | comma-separated values |
| EMR | electronic medical record |
| FH | Fred Hutch |
| HISE | Human Immune System Explorer |
| IDE | integrated development environment |
| PHI | private health information |
At a Glance
Watchfolders are project-specific spaces used to transfer data to HISE. If the data is associated with an automated pipeline, it can be moved to the Project Store for analysis. (For ingestion of data that's not associated with an automated pipeline, see Ingest Data into the Project Store (Tutorial). Contact immunology-support@alleninstitute.org for watchfolder setup or modification.
File Format
Label your ingestion files with the correct file type, such as `LabResults`, `TestResults`, or `clinical_labs`. If your files are not labeled or the label doesn't match the file type, a Dismiss error appears on the ingest receipt.
You can create multiple file types (for example, `SurveyResults`) containing different content types. The Regex should include a filename. See the following table for examples, and refer to the boxed instructions to test your filename.
| File content | csv filename | Regex |
| Lab results | `clinical_data` or `clinical_labs` or `labresults` | `(?i)(.*((lab|test)results).*)|(.*((clinical)\_(labs|data)).*)|(.*(clinicaldata).*).csv` |
| Survey data | `survey_data`, `survey_results`, or `surveyresults` | `(?i)(.*((survey)results).*)|(.*((survey)\_(survey|data)).*)|(.*(surveydata).*).csv` |
| EMR data | `emr_data` or `emrdata` | `(?i)(.*(emrdata).*)|(.*((emr)\_(data)).*).csv` |
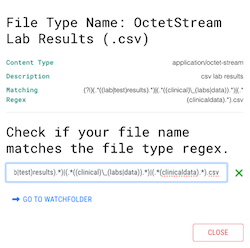
Test Your Filename1. In the upper-right corner of your screen, click your name. 2. Click Watch Folders. 3. Click the file type you plan to upload, such as OctetStream Lab Results (.csv). 4. Paste your proposed filename into the box, and press Enter. If your Regex is properly constructed for the selected file type, a green X appears to the right of text entry field, and a link to the watchfolder appears below it. If the format is not correct, a red X appears.
|
Human Metadata Ingestion
Files associated with human metadata, such as data from study cohorts, require special handling to protect patients' privacy. All ingested data must be de-identified and free of PHI. To prepare your files for ingestion, follow the instructions in the relevant section below. Then proceed to the general instructions.
Lab results
Create the necessary file type, and include the correct filename (`clinical_data` or `clinical_labs` or `labresults`) in the regex (See "File Format," above).
EMR data
Create the necessary file type, and include the correct filename (`emr_data` or `emrdata`) in the Regex.
Survey data
1. Create the necessary file type, and include the correct filename (`survey_data`, `survey_results`, or `surveyresults`) in the Regex.
2. To upload metadata files, HISE must have knowledge of a matching data dictionary. Export the `SurveyDesign` from the REDCap Data Dictionary. The name of a new survey design should be part of the name of the file to be ingested. For example, if the filename is `10265Cohort1-AllQuestionnaires_DATA_2021-03-18_0927.csv`, the survey design name could be `Cohort1`.
3. If you use the Design Version Create Survey Design modal, the survey design should also be included in the ingest filename. For example, if the filename is `10265Cohort1-AllQuestionnaires_DATA_2025-03-18_0927.csv`, the design version could be `10265` or `2025-03`.
4. For the survey design scheme itself, identify the headers of the file to be ingested (Subject and Visit Name columns) OR (Sample Kit GUID column). Then search for variable name or .csv headers of interest. For example, for FH the variable name of a subject is `al_id`. Use the far-right column to add the variable name as a custom identifier. The variable name corresponds to the key in the key/value pair in the sample's EMR data.
5. If the header you want doesn't exist, click Add Survey Design Scheme Row. For example, let's say an FH user wants a Visit Name header in the ingested .csv, but that header doesn't exist in the Survey Design Scheme. The user would add the header as the variable name (`AI Study time point`), add `Visit Name` as its identifier, and then click Add Row.
Instructions
For special preparation of files containing human metadata, see the preceding section and consult your organization's data privacy policy or legal representative.
To upload properly prepared files of any kind, with or without human metadata, follow the process outlined below. If your data upload requires an automated process, contact us at immunology-support@alleninstitute.org to discuss the options.
1. To upload data to a watchfolder, navigate to HISE and log in with your organizational email address.
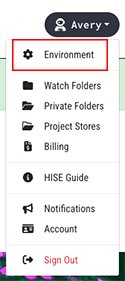
2. In the upper-right corner, click your name, and choose Environment from the drop-down menu.
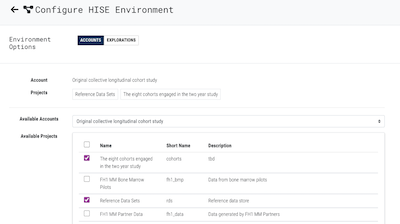
3. On the Configure HISE Environment screen, stay on the Accounts tab, and click the drop-down menu next to Available Accounts. From the list in the Available Projects section, choose the account(s) you want to work with.
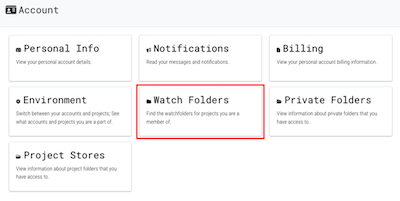
5. Near the upper-left corner of your screen, click the arrow to move to the Account screen, and then click Watch Folders.
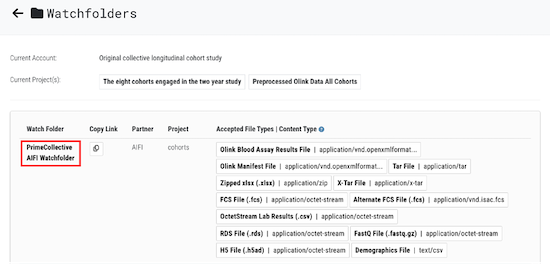
6. Choose the watchfolder for your account and project.
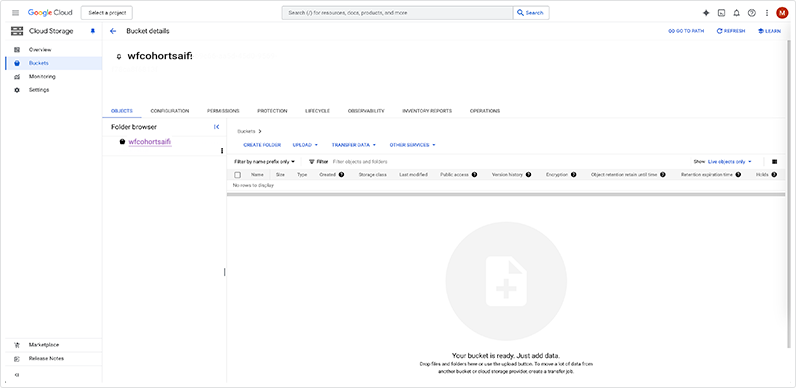
7. The Project Store opens. Click UPLOAD FILES, or drag and drop your files into the watchfolder. Note that files in Google Drive, such as .csv files created in Google Sheets, can't be uploaded directly to your watchfolder or dragged into it. Download the files first, and then upload them from your Downloads folder.
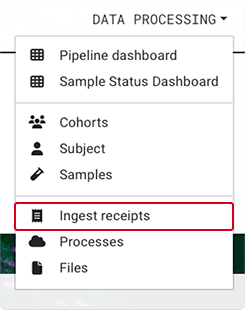
8. To see the status of your uploaded files, from the top navigation menu, click Data Processing, and choose Ingest Receipts from the drop-down menu.
A. In the Status column, a Success tag means that the file was ingested.

B. A Dismiss error means that the file Regex is not formatted correctly.
C. A Failure error means that there was some other problem uploading the file. Try again, and if the issue persists, open a ticket at immunology-support@alleninstitute.org.


 Related Resources