Manage Attribution in Open Science Publications (Tutorial)
| Abbreviations Key |
| DOI | Digital Object Identifier |
| HISE | Human Immune System Explorer |
| NIH | National Institutes of Health |
| ORCID | Open Researcher and Contributor ID |
| ROR | Research Organization Registry |
At a Glance
Proper attribution is a core principle of open science. HISE publications and Data Apps credit authorship of data releases at all levels, including scientific insight, back-end infrastructure development, data sets, and community support efforts.
Authorship and Funding
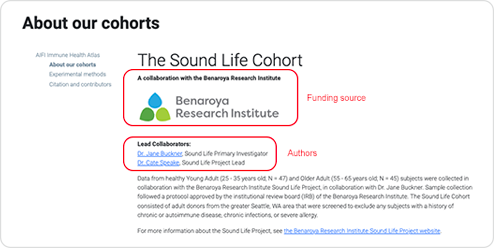
The authors' names and the source (or sources) of funding for their work appear in a prominent place in the finished publication or Data App.
Publications
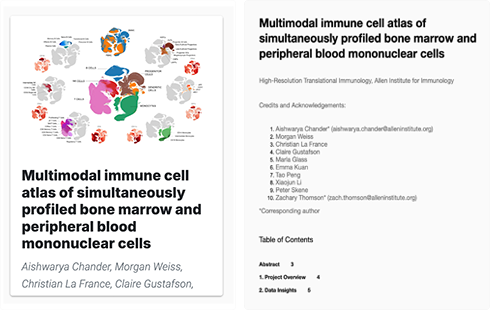
In a HISE publication, authors and contributors are credited on the publication card (left) and on the publication's title page (right).
Data Apps
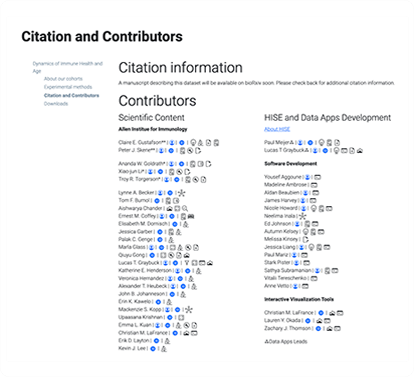
In a Data App, authors and contributors are credited in a page called About, Authorship, Contributors, or a similar title, as shown in the accompanying examples. The author chooses the page title. Authors, contributors, or funding sources can be acknowledged on multiple pages if it makes sense to do so.
ORCID
Data Apps authors are identified by ORCID ID, a name-independent person identifier that reduces ambiguity in research attribution and encourages transparency in authorship, contributions, and research affiliations. The ORCID Registry assigns this 16-digit ID at random, as in the following example:
ORCID ID: 0000-0001-5309-0867
ORCID profile: http://orcid.org/0000-0001-5309-0867
ROR
The authors' affiliations might not match one another, and they aren't necessarily the same as the funding source for the work. For example, a researcher from AIFI might work with a researcher from Fred Hutch, and their work might be funded by an NIH grant. Furthermore, the names of some institutions, such as Miami University and Washington University, are ambiguous. Data Apps include ROR IDs to ensure that all affiliations are clear.
DOI
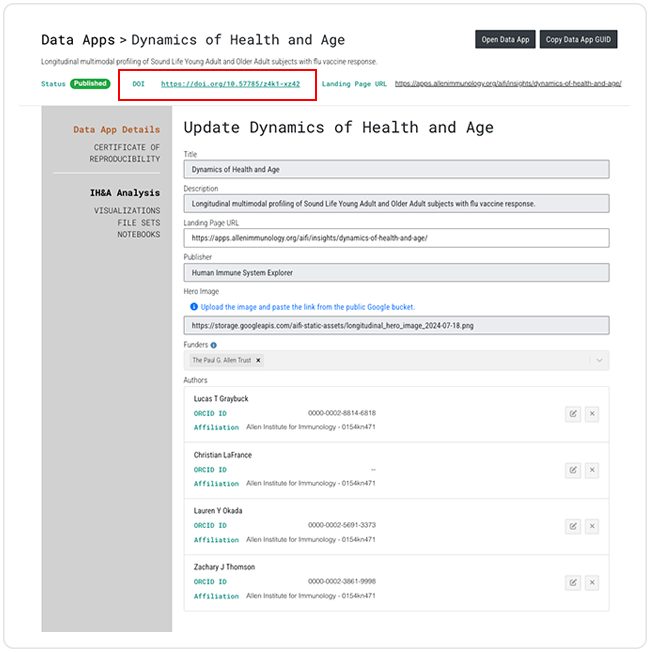
Data Apps use DOI numbers to track document provenance and versioning. These unique identifiers are registered in a central database and include metadata (such as title and author) that helps create a citation recognized throughout the scientific community. The DOI is generated automatically. When your Data App is published, the DOI appears at the top of the Data App Details page, as shown in the accompanying image.
Instructions
Add an author to a HISE publication
1. Navigate to HISE, and use your organizational email address to sign in.
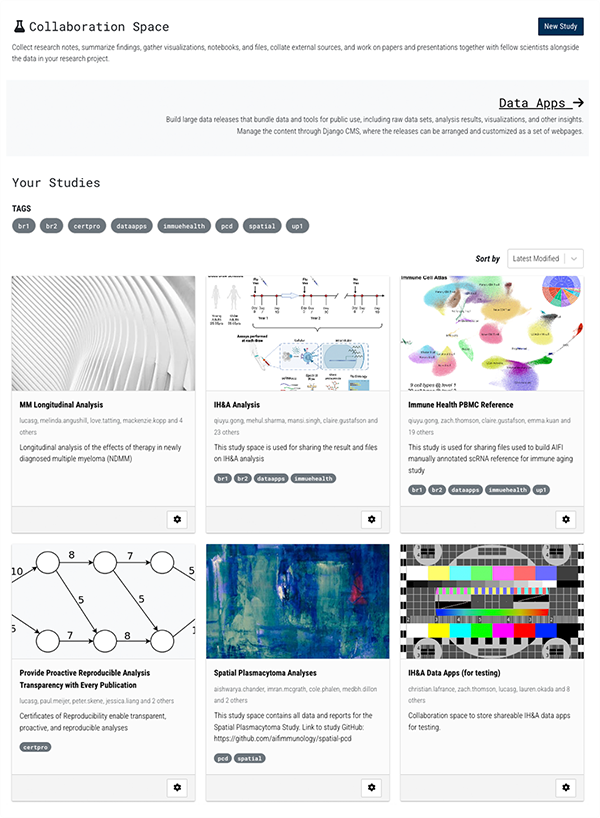
2. From the top navigation menu, choose COLLABORATION SPACE, and then choose the study you want to work with.
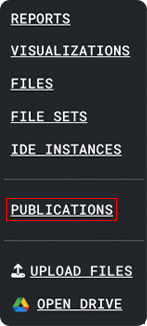
3. From the side navigation menu, click PUBLICATIONS.
4. In the upper-right corner of the screen, click Start New Publication.

5.In the Start new publication dialog box, in the Select the starting report field, click the arrow and choose a report from the drop-down list.
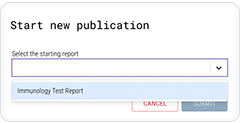
6. Click SUBMIT.
7. On the Create Publication screen, click Add Author.
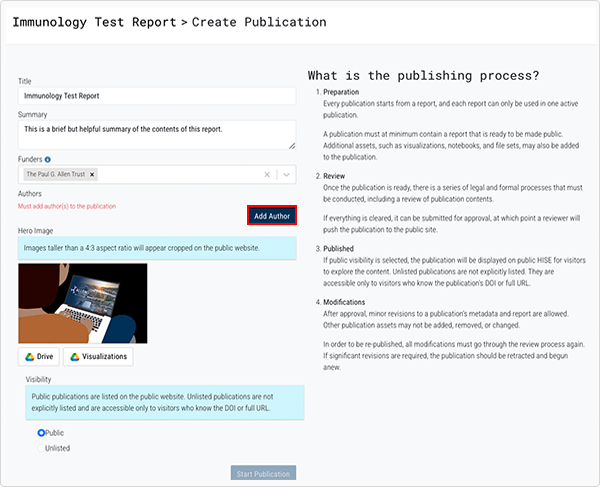
8. Proceed to Step 4 in the next section, Add an author to a Data App. From that point on, the instructions to add an author to a publication or a Data App are identical.
Add an author to a Data App
1. Navigate to HISE, and use your organizational email address to sign in.
2. Navigate to COLLABORATION SPACE > Data Apps, and click the card for the Data App you want to modify.
3. In the Authors section, click Add Author.
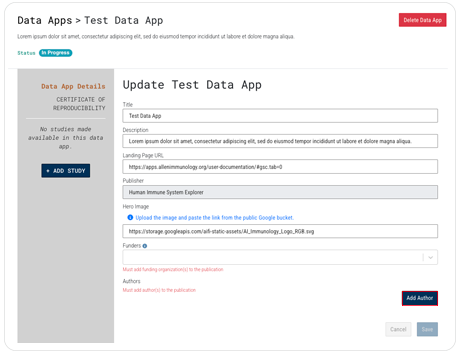
4. In the Add/Edit Author dialog box, enter the author's first name, last name, and other requested metadata.
A. If the author is not affiliated with AIFI, replace the default entries in the Affiliation and Affiliation ROR ID fields. To look up the ROR ID, visit the ROR search page.
B. In the ORCID ID field, enter the author's ORCID ID if known. To look it up, visit the ORCID registry.
C. In the Suffix field, add "Jr," "IV," or another generational suffix. Don't enter academic credentials, such as "PhD."
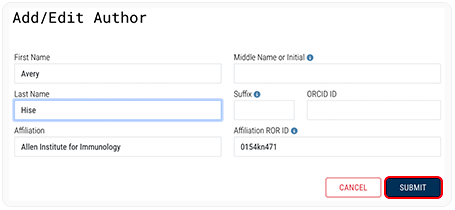
5. Click SUBMIT.
Add a funding source to a Data App
1. Navigate to HISE, and use your organizational email address to sign in.
2. Navigate to COLLABORATION SPACE > Data Apps, and click the card for the Data App you want to modify.
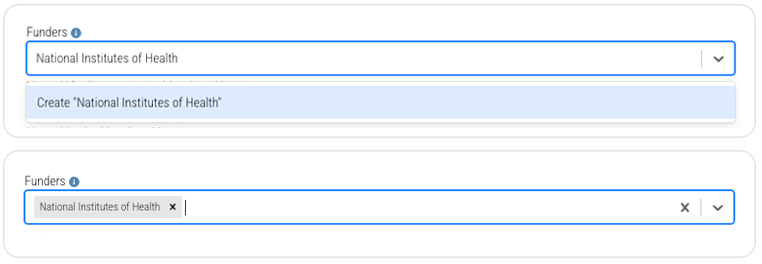
3. In the Funders field, click the arrow to see the default funder. If it's correct, click the funder's name to select it.
4. If the default funder is not correct, or if you want to add additional funding sources, type the funder's name into the Funders field, and press Enter to create a new funder.


 Related Resources