
Manage Organizational Billing (Tutorial)
At a Glance
 | Abbreviations Key |
| AIFI | Allen Institute for Immunology |
| HISE | Human Immune System Explorer |
The organizational billing features discussed in this document are visible only to billing users. If you're a billing user, you'll see an ADMIN tab to the left of your name (or in the vertical menu at smaller screen sizes).

Track Expenses
Instructions
1. Navigate to HISE, and use your organizational email address to sign in.
2. In the upper-right corner of your screen, click your name, and choose Billing from the drop-down list.
3. On the Billing page, click the Organizational Billing tab.

4. Review your account information, and choose the billing period:
A. Near the upper-left corner, find your account name.

B. Near the upper-right corner, the billing period is displayed. To change it, click the arrow to the right, and choose a new date from the drop-down list.
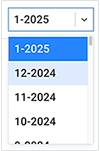
C. To produce an invoice for a given billing period, select the billing period and click Download Invoice.

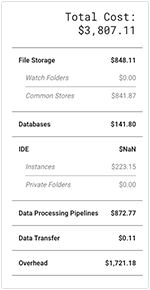
5. Near the top left, review the Total Cost (monthly, in USD) for your organization (in this case, $3,807.11). Then review the following = breakdown of costs for file storage, databases, IDEs, pipeline processing, data transfer, and overhead.
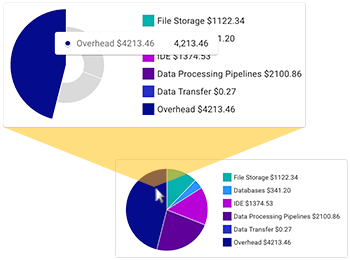
6. To the right of the cost breakdown, review the same information in a pie chart format. To see a particular expense on the chart, hover your mouse over that sector.
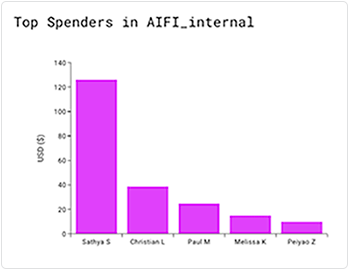
7. Review the graph of the Top Spenders in [Your Organization], and work with these users to contain costs. For example, remind the top spenders to stop their running instances when the IDEs are not in use, and ask them to delete stopped instances that are no longer needed. For details, see Best Practices for NextGen IDE Users.
8. If you're a billing user, periodically check the Partner Accounts Quota Overview to see how close each partner organization is to reaching its monthly cloud billing quota.
A.To see spending details, hover your mouse over each bar in the graph.
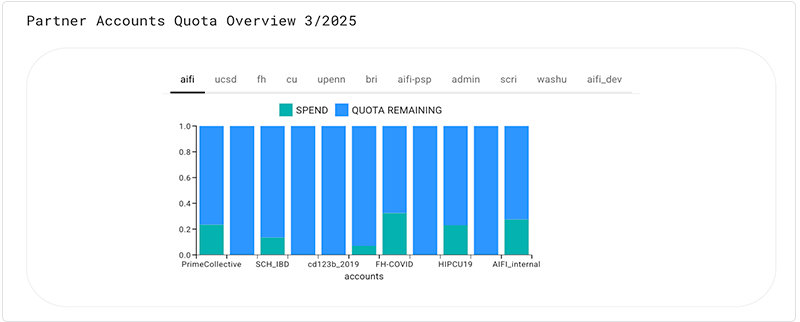
B. To drill down in a particular account, click the selected account in the row at the top, and hover over each column.
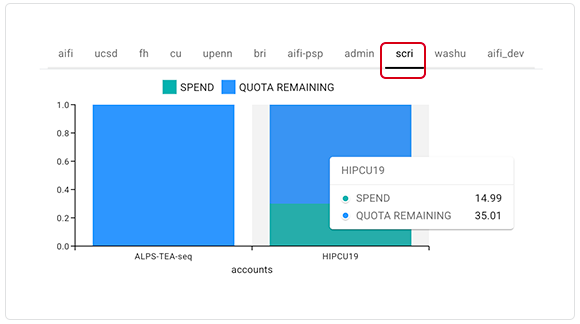
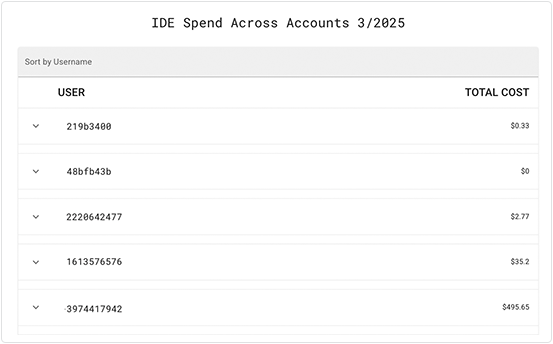
9. To see expenses for individual users within your organization, review the IDE Spend Across Accounts section:
A. Click the arrow next to a user's email address to display the following data:

i. Instance ID. List of each user's instances
ii. Partner. Name of the partner with which each user is affiliated
iii. Billing Category. Category options are as follows: ide, nextgen-ide, ide-disk, private-folder
iv. Cost per instance. Monthly cost in USD
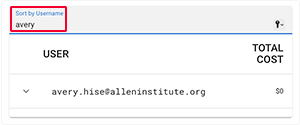
B. To find a given user, click Sort by Username, and type the first few letters of the user's email address.
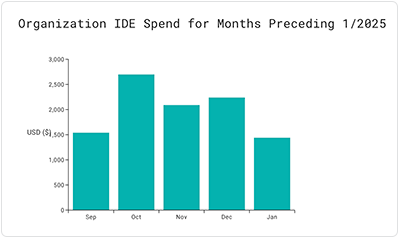
10. To keep an eye on spending trends, periodically review the IDE Spend for Months Preceding [Date] graphic.
11. Scroll to IDE Spend Across Accounts:
A. To sort the list by username, click USER (left column).
B. To sort the list by dollar amount, click TOTAL COST (right column).
View or Change Organizational Data
Instructions
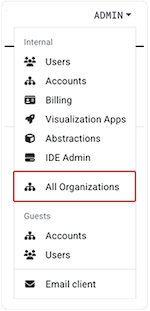
1. From the top navigation menu, click ADMIN, and choose All Organizations from the drop-down list.
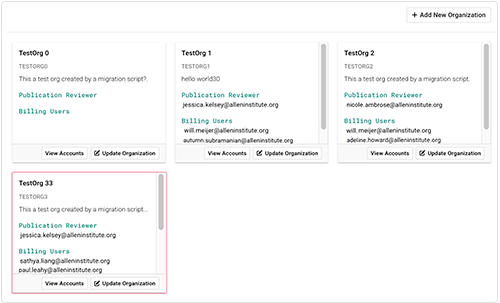
2. On the All Organizations page, click the card for your organization.
3. Update your organization:
A. On the Organizations > [Your Organization] page, click Update Organization.
B. In the appropriate field, change the name of the organization, add or change the description, or add or delete publication reviewers or billing users.
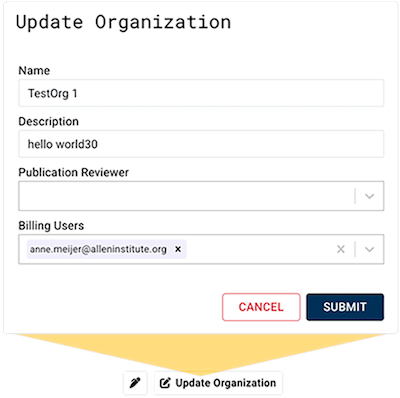
C. Click Submit.
 Related Resources