Last modified 2026-03-30 |
|
Use Advanced Search for Basic Queries (Tutorial)
| Abbreviations Key |
AI/ML | artificial intelligence/machine learning |
gz | gzip |
Human Immune System Explorer | |
IDE | integrated development environment |
KT | [sample] kit |
umap | uniform manifold approximation and projection |

At a Glance
Advanced Search lets you define the subjects, file types, or studies you want to find in HISE. With this powerful feature, you can create queries and filter result files by file, sample, EMR metadata, or public files. You can use your results to create a new file set, add to an existing set, send the data to an IDE for further inspection, or (in some cases) visualize your results. This document explains how to create, save, and share basic queries, as well as how to use your search results.
For instructions on executing advanced queries, see Use Advanced Filters for Complex Searches (Tutorial). If you have questions or need help, contact Support.
Description
Instructions
Step 1: Open Advanced Search and sign in
Step 2: Choose a search type and build your query
PUBLIC FILES search
Step 3: Save or share your query
Related Resources
Description
Advanced Search is the gateway to finding and accessing all your research output, including data files and human metadata. The various assay data analysis pipelines configured for your project produce specific output files and reports. To inspect the output of an analysis for a number of samples at the same time, use Advanced Search. If your project is configured with a project folder instead (or in addition), use Advanced Search to locate specific files within the folder.
Instructions
 Open Advanced Search and sign in
Only projects to which you have access are shown, and the projects you select must be in the same account. If you can't find the files you want, it's likely they're in a different account or project. To see which projects and accounts are visible to you, sign in to HISE. In the upper-right corner click [Your initials] > Environment. Then view or change your selections under Available Accounts or Available Projects. For details, see the Organizations, Accounts, and Projects section in Get Started with HISE. |
Use the left tab to build a new query, or click the right tab to use a saved or shared search. Follow the instructions on the tab.
 Start a new query
1. Navigate to HISE, and use your organizational email address to sign in.
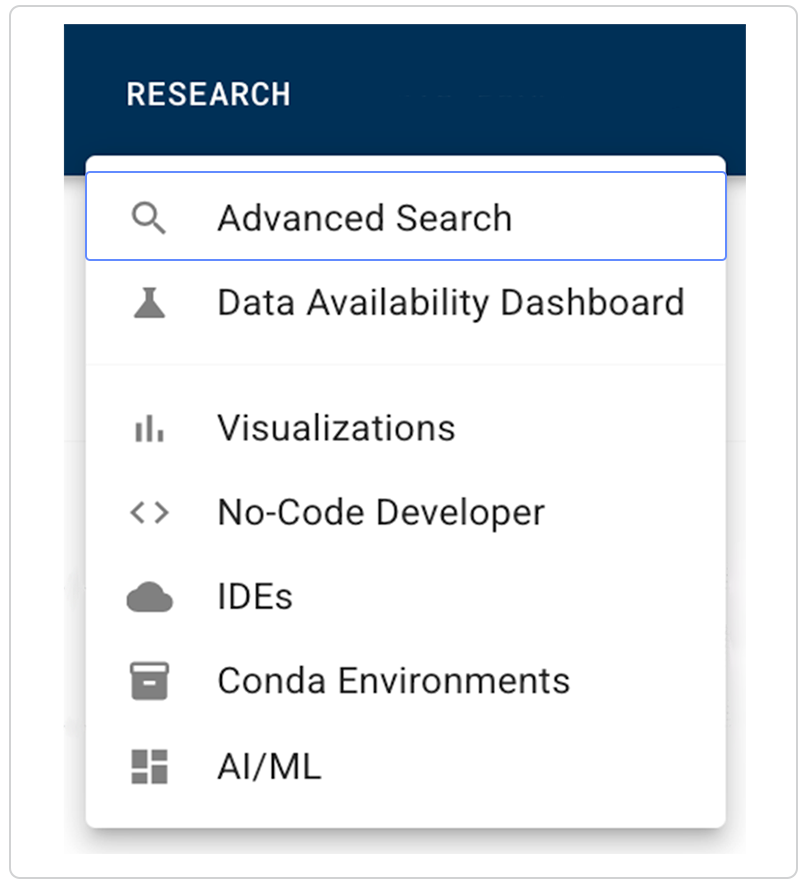
2. In the top navigation menu, click RESEARCH.
3. From the drop-down menu, choose Advanced Search.
Use a saved or shared query
You can begin your search with a saved query in one of two ways. If someone gives you the URL of a saved query, such as http://allenimmunology.org/#/advanced-search/query/*queryId*, paste it directly into a browser to open it. Alternatively, you can open a saved query from the Saved & Shared Queries space. See the instructions following the NOTE box.
Only owners can modify saved queries. At the top of the results window, a status bar shows the title of the query, the email address of the person who shared it with you, a Saved confirmation, and a tag showing whether it was Shared with select users, as shown here, or Shared with everyone.
|

1. Sign in to HISE, and navigate to Advanced Search as you would for a new query (for details, switch to the Start a new query tab).
A. In the upper-right corner, click VIEW SAVED & SHARED.

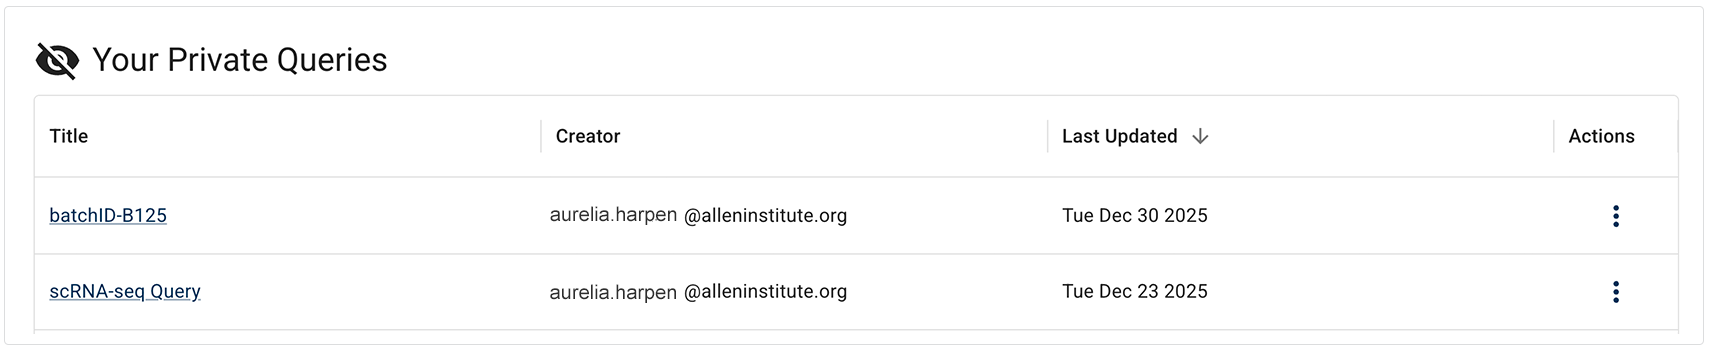
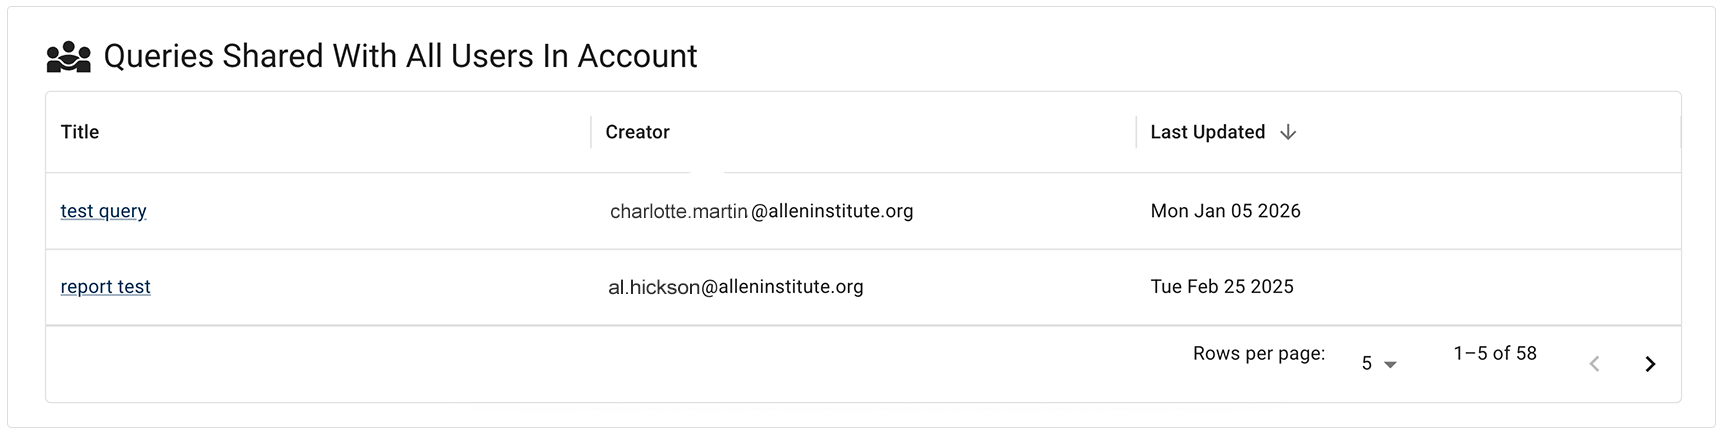
B. Choose a private saved query, a query that you've shared with one or more people, a query shared with you, or a query shared with everyone:
i. In the Your Private Queries section, click the title of the saved query you want to use.
ii. In the Queries You Have Shared section, click the title of the shared query you want to use.

iii. In the Queries Shared with You section, click the title of the shared query you want to use.

iv. In the Queries Shared with All Users in Account section, click the title of the shared query you want to use.
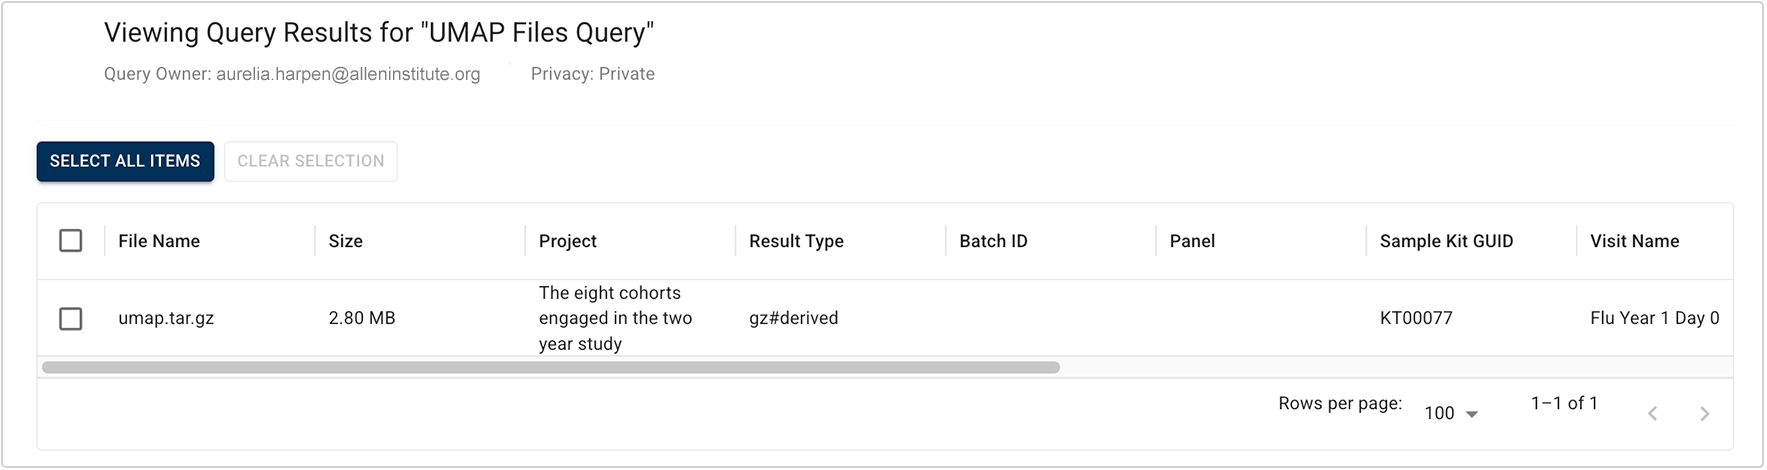
C. When the query opens, proceed directly to the results window. (You don't need to select filters, since filter selections are already baked in to the saved query.) Use the checkboxes to select the items you want to use, as in the example shown here. To select all results, click SELECT ALL ITEMS.
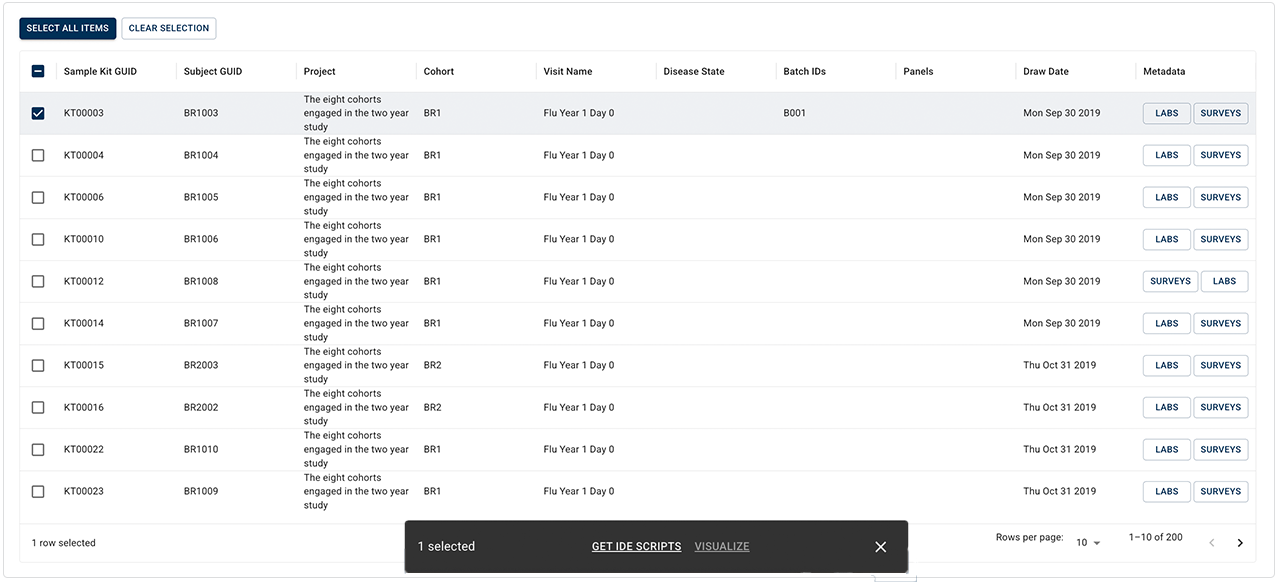
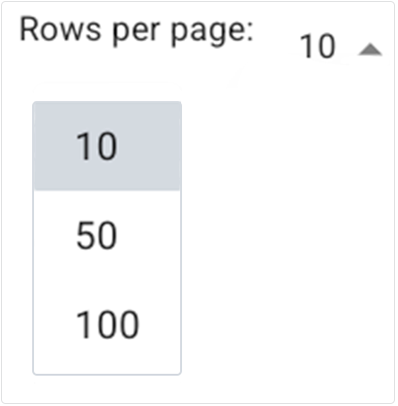
i. (Optional) To save time, you can adjust the number of rows per page displayed in the results window. In the lower-right corner of the table, click Rows per page. Then click the arrow to open the drop-down list, and select 10, 50, or 100. The default is 10.
ii. To see how many results are displayed on the page (in this case, 1–10) and the total number of results returned (in this case, 200), check the lower-right corner of the results window.

iii. Use the arrows to navigate through your results:
a. To move to the next page, click the right arrow (>).
b. To move to the previous page, click the left arrow (<).
c. The left arrow remains grayed out (inactive) while you are on the first page of results, as shown in the accompanying image.
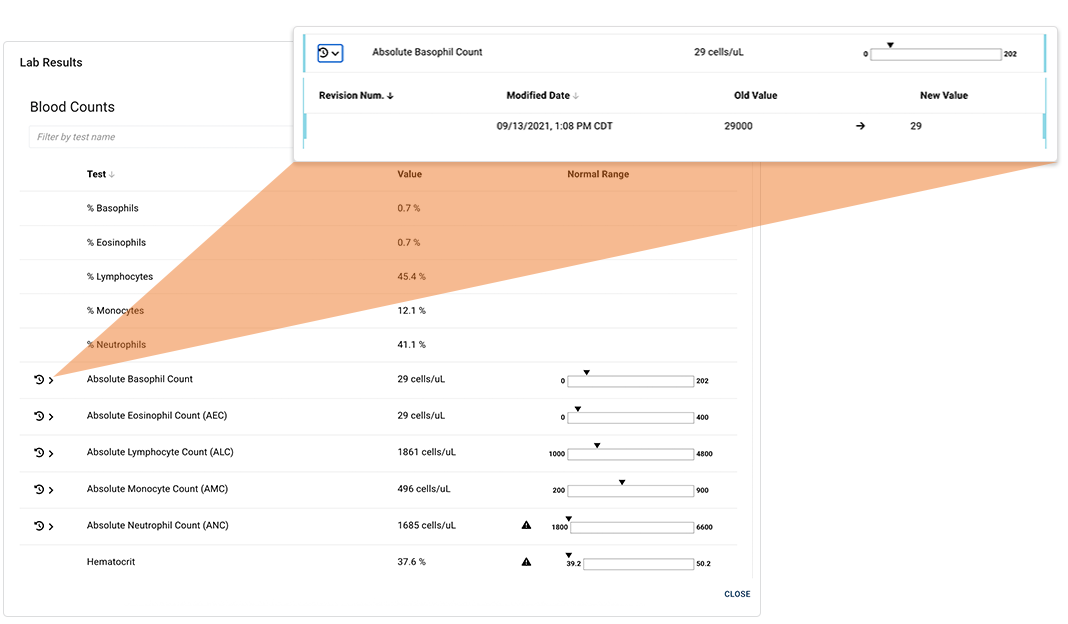
iv. View detailed lab results:
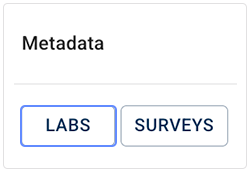
a. In the Metadata column, click LABS.
b. Click the arrow to open the details panel for any result.
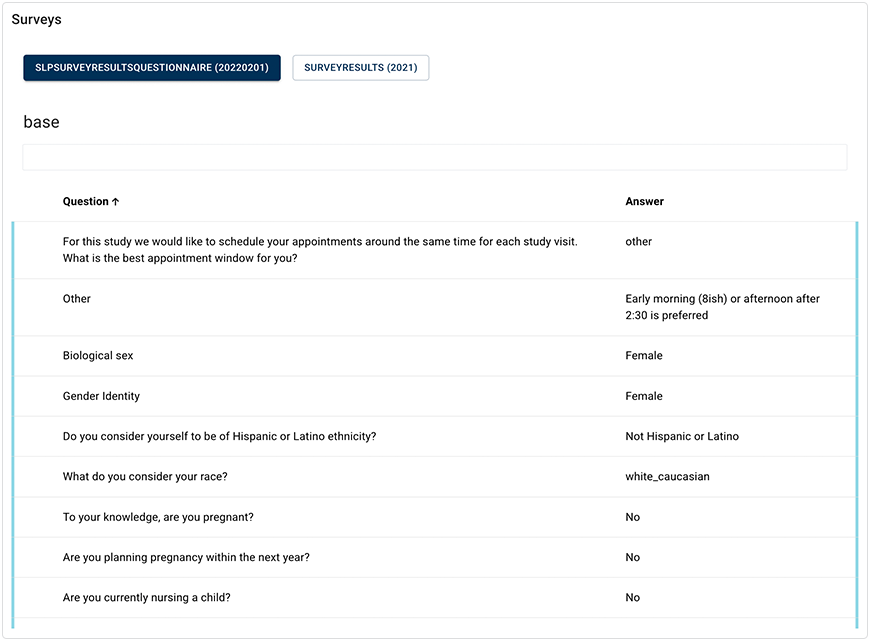
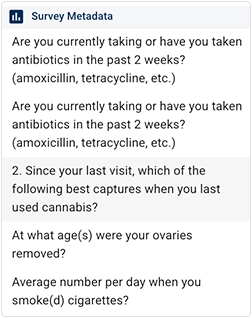
v. View detailed survey results:
a. In the Metadata column, click SURVEYS.

b. View the related survey results. To return to your query, click CLOSE in the lower-right corner.
D. Select an option from the floating options bar. In the preceding image, GET IDE SCRIPTS is the only available option.
 Choose a search type and build your query
Follow the instructions below to build a FILES, SAMPLES, or SUBJECTS query in Advanced Search.
FILES search
1. To search by file attributes, stay on the default FILES tab. To use this filter, you must choose at least one project and at least one file type.

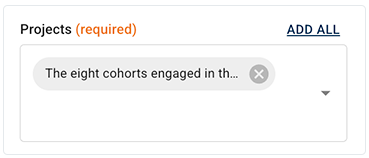
A. In the Projects field, click the arrow to open the drop-down list, and select one or more projects whose files you want to include in your search results. Alternatively, to select all available projects, click Add all.
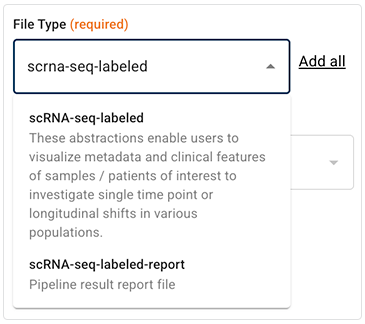
B. In the File Types field, enter a file type, or click the arrow to open the drop-down list. Choose one or more file types.
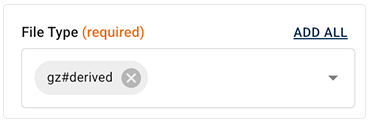
Many file types, such as the scRNA-seq file types shown here, are annotated with general descriptions of the file content or format. If you're not sure which file type you want in your search results, use these descriptions to help you decide.
|
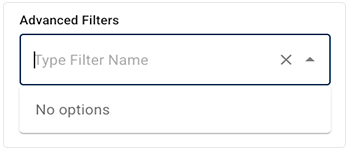
C. (Optional) In the Advanced Filters field, type a filter name, or click the arrow to open the drop-down list.
i. Choose one or more filters. (For a complete list of filters and instructions on using them, see Use Advanced Filters for Complex Search Queries (Tutorial).) Here we chose File Name from the File Metadata filter group.

In some cases, no advanced filters are available.
|
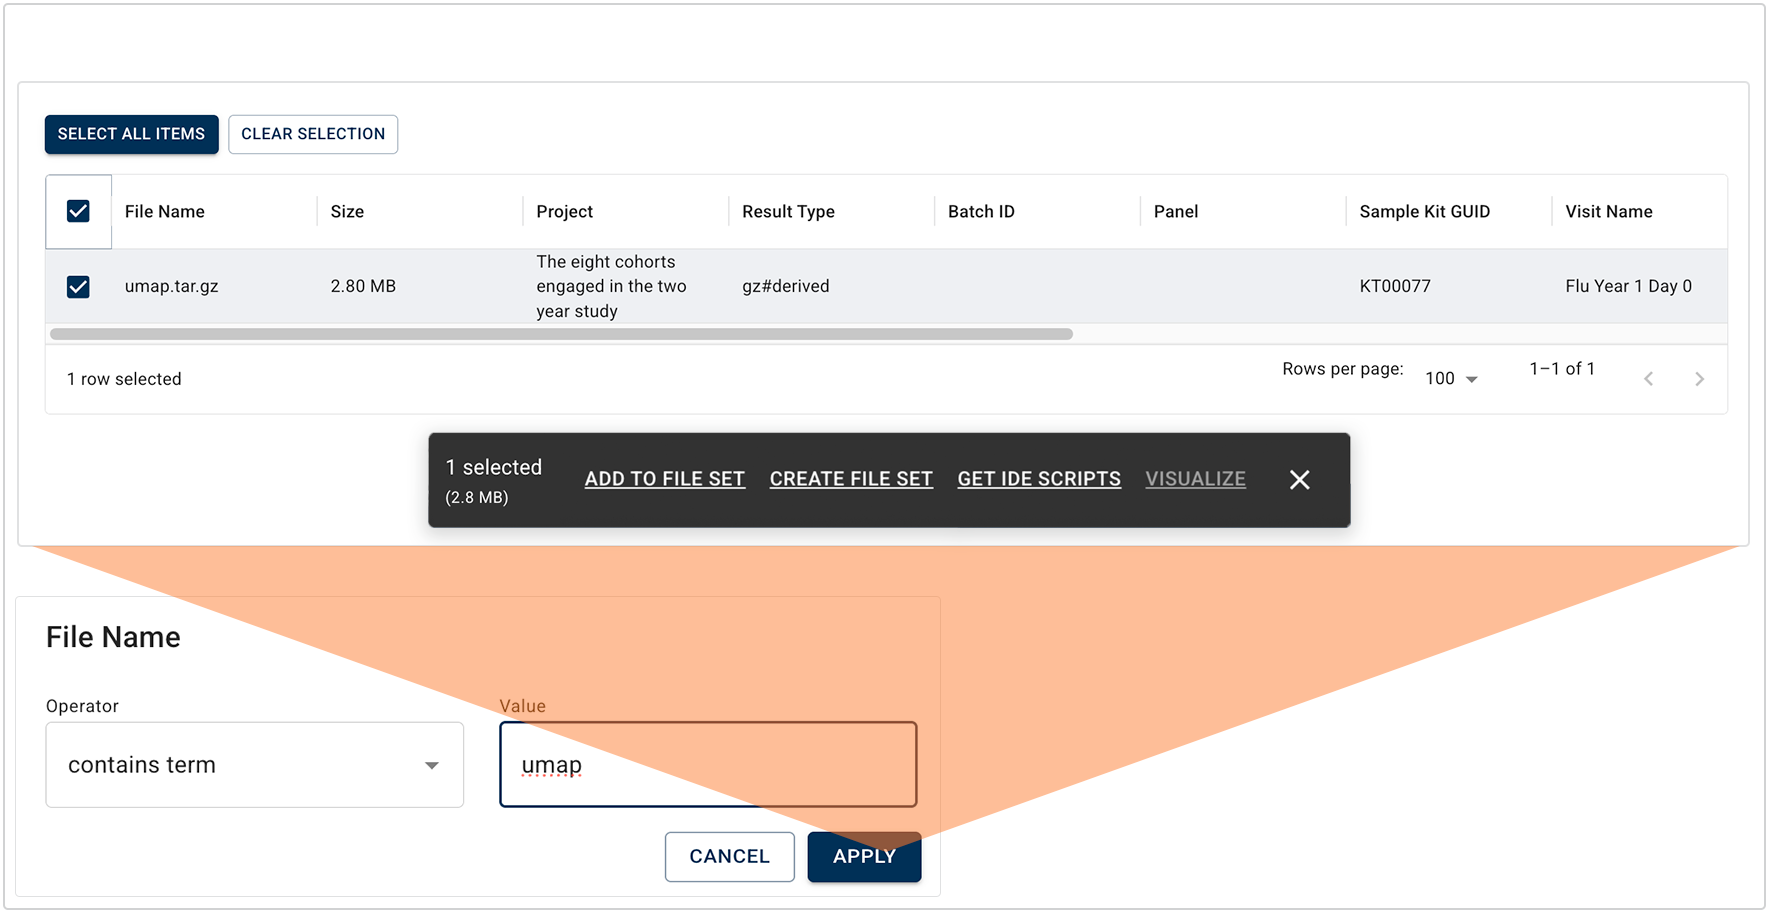
ii. Choose an operator and a value. In this case, as shown in the image below, we chose contains term as the operator and umap as the value. Click APPLY.
D. Click the checkboxes to select the results you want to keep. The left side of the floating options menu displays the number of items selected and the total file size.
E. In the floating options menu, click the link that represents what you want to do with the returned results (in this case, ADD TO FILE SET, CREATE FILE SET, or GET IDE SCRIPTS). If you select a large data set that times out during this step, use the file size information on the floating options menu to divide your task into manageable chunks.
VISUALIZATION is currently supported only for the file type Flow cytometry frequency stats summary. |
SAMPLES search
1. To search by sample attributes, click the SAMPLES tab. To use this search type, you must choose at least one project.

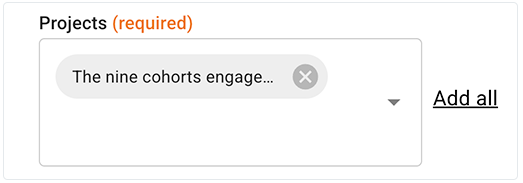
A. In the Projects field, click the arrow to open the drop-down list, and select one or more projects. Alternatively, to select all available projects, click Add all.
If you select multiple projects, you might see duplicate results in the results window. This can happen, for example, when multiple surveys contain the same question.
|
B. (Optional) In the Advanced Filters field, type a filter name, or click the arrow to open the drop-down list.
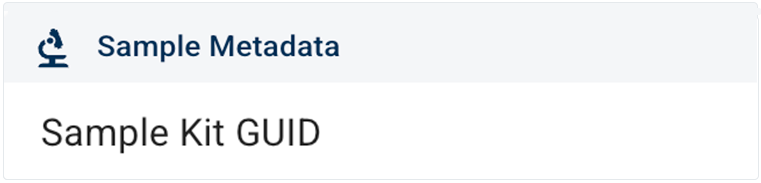
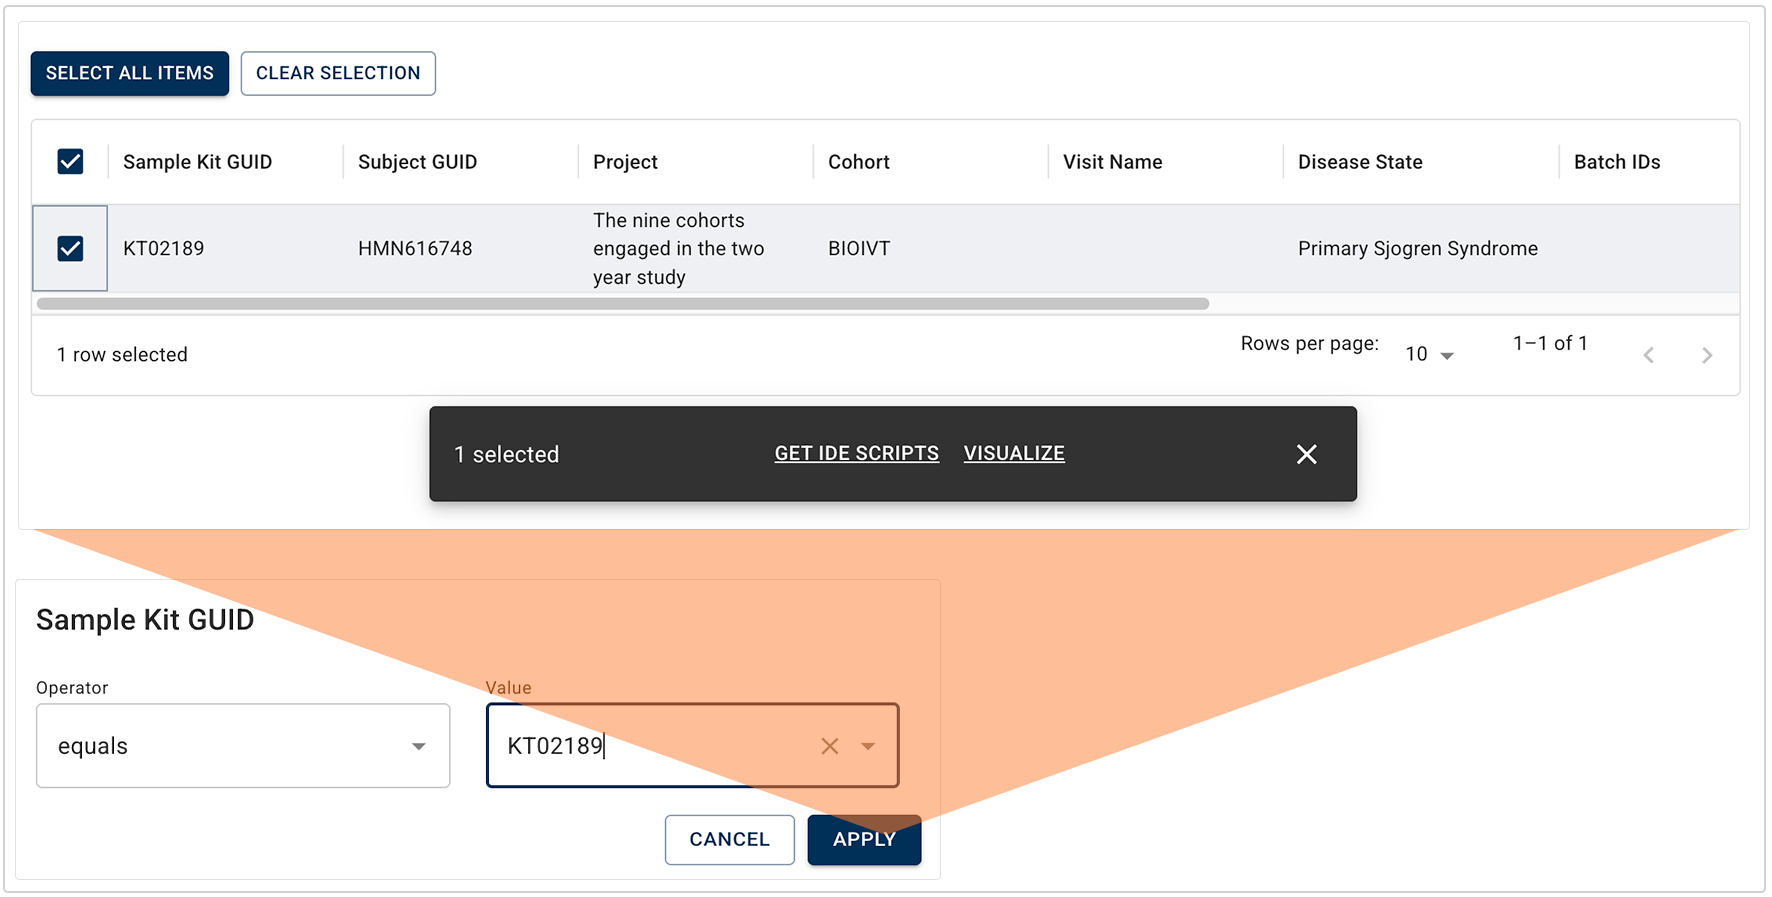
i. Here we chose Sample Kit GUID from the Sample Metadata filter group. (For a complete list of filters and instructions on using them, see Use Advanced Filters for Complex Search Queries (Tutorial).)
ii. Choose an operator and a value. In this case, as shown in the image below, we chose equals as the operator and KT02189 as the value. Click APPLY.
C. Click the checkboxes to select the results you want to keep.
D. In the floating options menu, click the link that represents what you want to do with the returned results (in this case, GET IDE SCRIPTS or VISUALIZE).
EMR search
1. To search by subject attributes, click the EMR tab (shown here as the SUBJECTS tab). To use this search type, you must choose at least one project.

A. In the Projects field, click the arrow to open the drop-down list, and select one or more projects. Alternatively, to select all available projects, click ADD ALL.
B. (Optional) In the Advanced Filters field, type a filter name, or click the arrow to open the drop-down list.
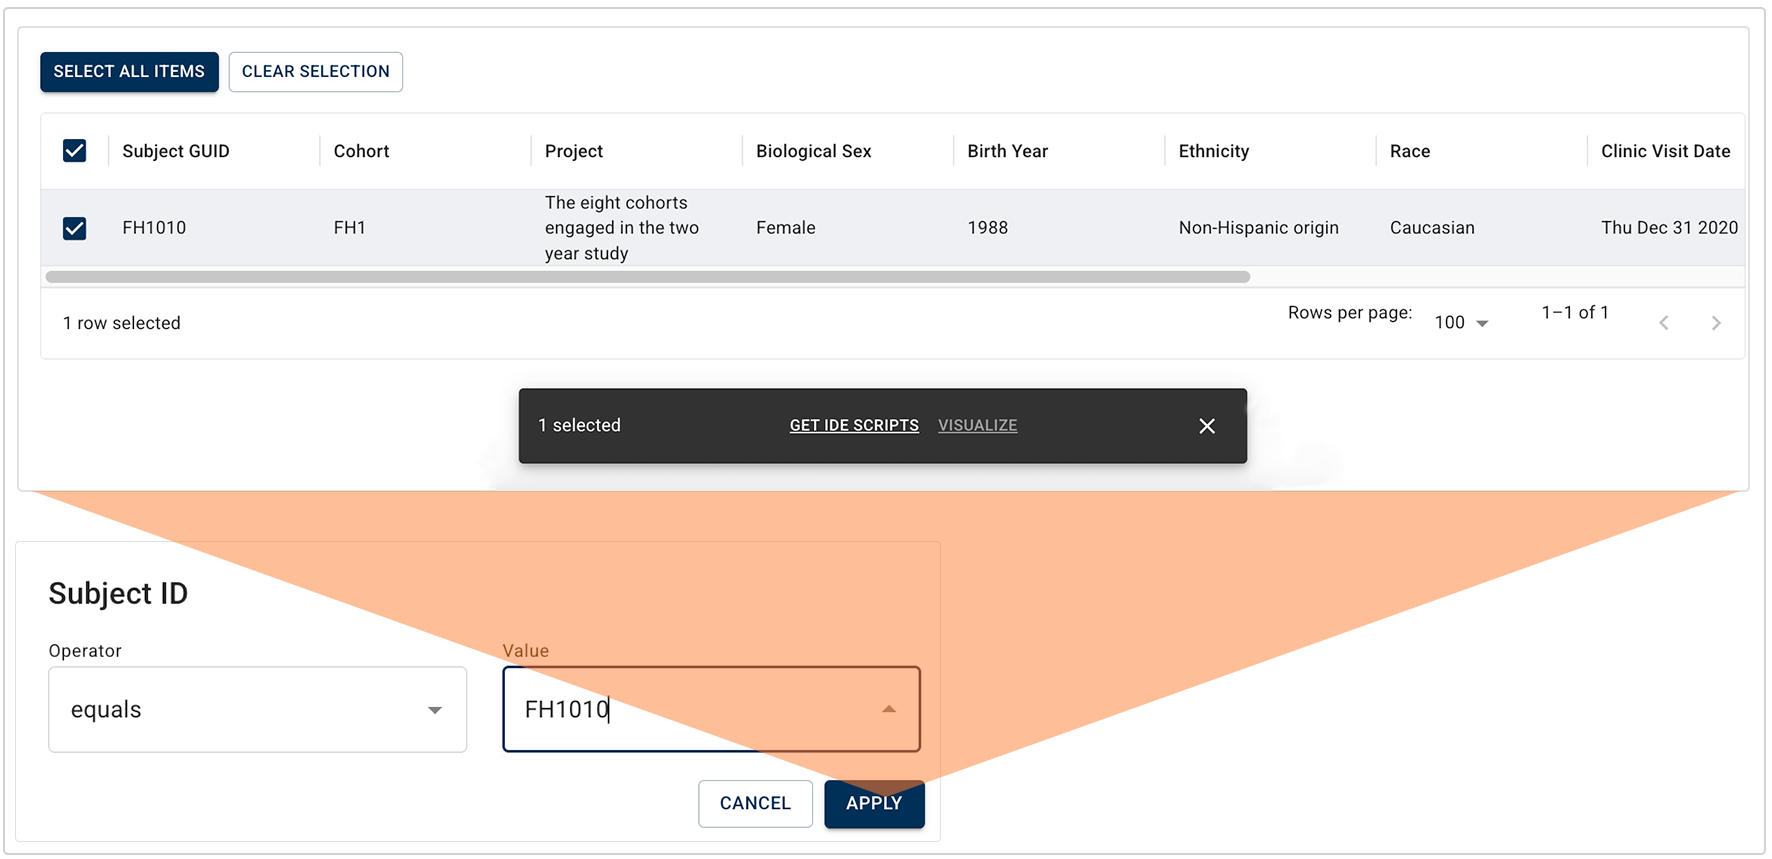
i. Here we chose Subject ID from the Subject Metadata filter group. (For a complete list of filters and instructions on using them, see Use Advanced Filters for Complex Search Queries (Tutorial).)

ii. Choose an operator and a value. In this case, as shown in the image below, we chose equals as the operator and FH1010 as the value. Click APPLY.
C. Click the checkboxes to select the results you want to keep.
D. In the floating options menu, click the link that represents what you want to do with the returned results (in this case, only GET IDE SCRIPTS is available).
 PUBLIC FILES search
1.To search public files, click the PUBLIC FILES tab. To use this search type, you must choose a release.
A. In the Release field, choose the Data App or publication associated with the data you want to find.
B. (Optional) In the Advanced Filters field, type a filter name, or click the arrow to open the drop-down list.
C. Click the checkboxes to select the results you want to keep.
D. In the floating options menu, click the link that represents what you want to do with the returned results, such as ADD TO FILE SET, CREATE FILE SET, or GET UUIDS.
 Save or share your query
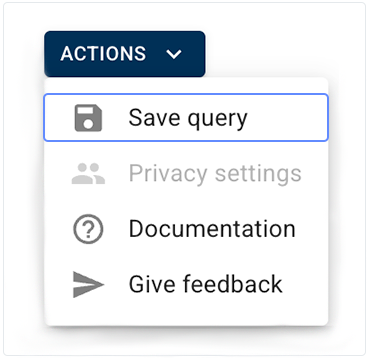
1. To reuse your query or share it with colleagues, you must first save it.
A. Click ACTIONS > Save query
B. Name the query, and click SAVE QUERY.
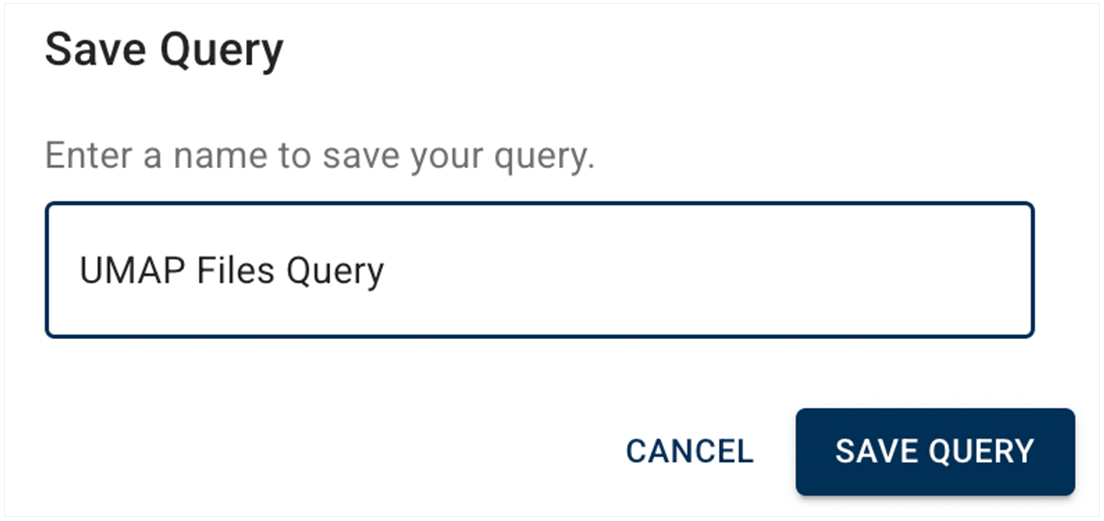
C. View the message in the confirmation window. Queries are private to you by default, as shown in the upper-left portion of the image.
D. To make your query available to selected colleagues or to all colleagues with project access, click VIEW SAVED & SHARED in the upper-right corner of your screen. To learn about query visibility and privacy settings, see Understand Advanced Search Concepts.
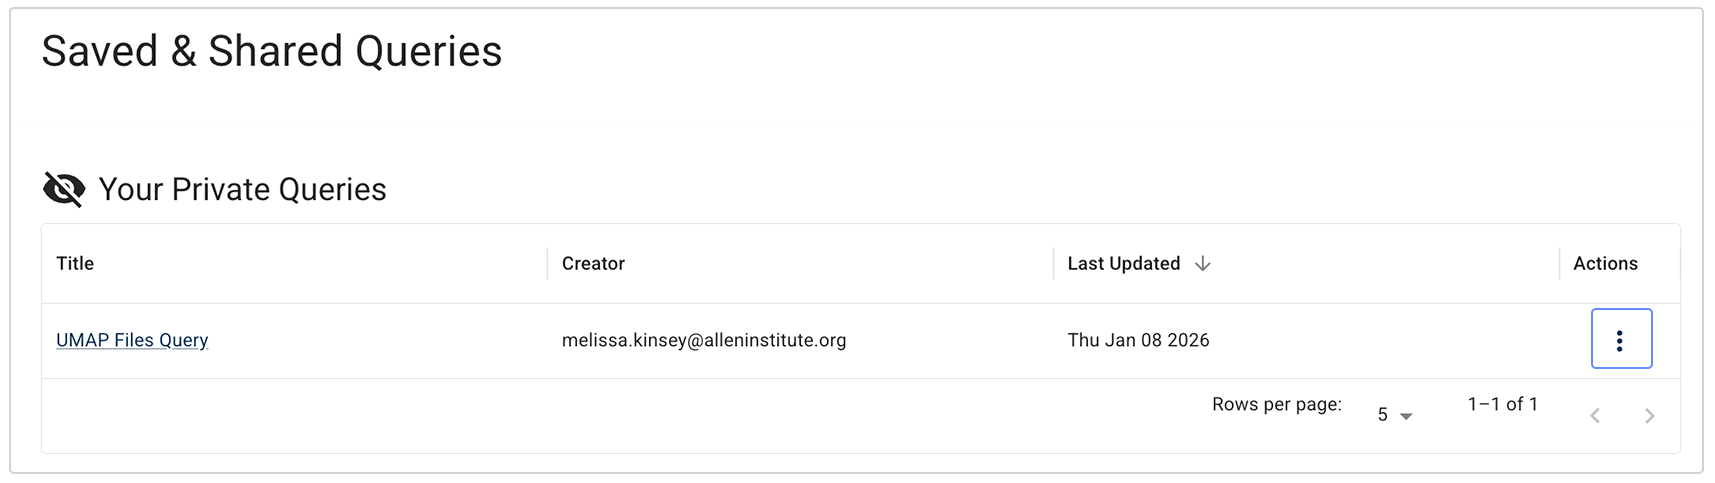
E. On the Saved & Shared Queries, page, in the Your Private Queries field, find the query you want to share. In the Actions column, click the ellipsis.
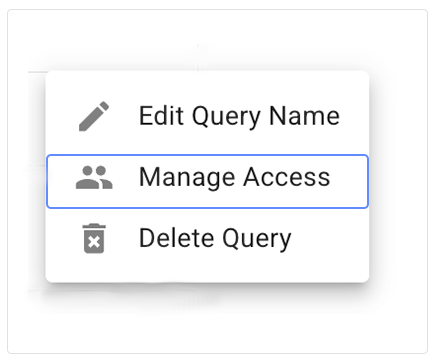
F. Click Manage Access.
G. In the Query Privacy Settings dialog box, change the visibility.
i. To share your query with everyone in the account, click Shared.
ii. To share your query with specified people, click Share with selected users. In the Select users field, in the drop-down list of email addresses, click the users with whom you want to share your query. The names listed in the Select users field represent everyone with account access. You can't share your query with users outside of your account.
 Related Resources
Understand Advanced Search Concepts
Use Advanced Filters for Complex Searches (Tutorial)